Tuesday, December 2, 2014

Air (Part II)

Now, to run this from the tank below the floor up through the bus body and out to the horns needed some other bits to work correctly.  First was to put in a pressure regulator, which by adjusting the dial could throttle the pressure to any desired between zero and 200 psi, or however much was in the system.
Pressure Regulator
Pressure Regulator

  This was an important consideration that many of the ‘air horn kits’ that I found on-line lacked, as it allows you to quiet your air horns/chimes while you’re in an area with people out and about, rather than a highway with people in vehicles.  While there are people who seem to delight in scaring people with a sudden blast of sound from an air horn at maximum pressure, this is horribly irresponsible and potentially dangerous.

'Soft' air lines, 1/2" ID in the box and the 3/8" ID around the outside ...
 As the regulator had not only a 1/2“ through port, but also two 1/4“ regulated out ports, I decided to use one of these to run to a pressure gauge that I could mount on the control panel.  For this I used mainly a ‘soft’ line of a tough plastic with a 3/8“ interior dimension (but was marketed as a 1/2“ air line), which was not great at turning corners, kinking easily, and causing me to use hard 90 degree elbows to make corners.  This was a great way to check what the pressure is in the auxiliary tank, but had the drawback in that when you dial back the regulator to quiet the horn/chime, you only see the regulated pressure, not the whole tank pressure.  However, as the regulator dial is mounted behind the driver’s seat, this regulated gauge allows you to change the pressure without looking back for too long while driving.  The gauge itself had threads that were just the size of a removed switch cap on the control panel, so the installation was relatively easy, despite having to route the line between all the other lights and switches on the panel.

Non-stepped control valves
 The next step after this was to install control valves to actually work the horns.  While some people on-line suggested using simple ball valves for natural gas/LP lines, these don’t automatically close, which poses an additional distraction while driving, as opposed to spring-loaded, normally closed valves.  I got two non-stepped valves, which are amazingly heavy-duty.  Stepped valves have three settings (closed, partly open, and full open), while non-stepped run from closed to full open and all the range in-between depending on how hard you pull on the handle.


Showing the hard lines from the pressure regulator to the valves mounted on the shelf to the port side of the captain's chair.
Showing the hard lines from the pressure regulator to the
valves mounted on the shelf to the port side of the captain's chair.
To counter the possible torque of pulling on one of the handles energetically during a tense moment, I ended up deciding to use hard lines from the regulator to the valves, which made things a bit easier as I needed to split the air line to get to both of the valves. The lines for the air horns was 1/2” (ID) line to supply the volume of air needed to sound the horn, which can drain the 20 gallon tank fairly quickly, and the hard line was constructed from ‘black’ pipe and brass fittings, and used Teflon tape to seal the threads.

Another view of the hard lines and valves without so much backlighting.
 These were attached to the shelf that I ended up constructing just above the captain’s chair on the port side, giving easy access to the valve handles, while also not blocking the view.  I had expected to put a couple of hanging lines on the handles (like the old truckers had), but the valves ended up being so low and handy that I decided against it.

The nice bright dot (of the bright driveway) is  where the air line will come up
The nice bright dot (of the bright driveway)
is where the air line will come up
  While I went with hard lines from the pressure regulator to the valves, most all of the rest of the line was ‘soft’, a thick, durable air brake line of woven fiber and rubber that could be bent into tight angles without crimping or binding.  This allowed for some flexibility of where to run the lines and to easily get the air to a horn along the curved roof.  However, it did pose one problem; that of how to run the soft line through the flooring, which was a 20 gauge steel sheet.
A brass barb fitting on a black iron pipe to go through the floor
 I got around this by using a short ‘hard’ pipe through the floor with flared barbs at each end to attach the pipe and the ‘soft’ line.
                      
A dark photo of the connection between the tank and the 'through-the-floor' fitting


 The first air sounding unit I put in was the air chime.  Nicely finished with brass, I wanted to install it with the pipes pointing up, but due to the construction of the lower ‘bell’ housing not having any drainage hole for rainwater, if I had, the air line down to the valve would fill with water and a winter freeze would have been disastrous.  So, it got mounted sideways, which still isn’t bad.  I ran the holes through one of the plates that I put over the school bus flashers, and piped a hard, brass air line in through the steel.  The mounting for this was simple, as the chime had three threaded holes to secure it, so once the exterior of the holes had been ringed with butyl sealant, it went together easily and securely.
4 Note Air Chime, Brass (From raneystruckparts.com)
  That said, a word of advice to people who might be considering doing something like this – be careful with your bolts after getting things in place.  The butyl sticks to everything, including bolt threads, and can make it tough to get things aligned. But it certainly can be worth it, as shown by the finished chime, in place:

The air chime in place above the driver's eyebrow

To be continued (in Part III) ...

Air (Part I)

One of the nice things about the bus is that it has an air system for the air brakes, which means that it has a compressor that runs off the engine with a mechanical pressure regulator and a dehydrator for the system, which doesn't mean that it makes apple chips, but rather that it helps keep water from building up in the brake lines (which can be a big deal in the winter!). You might ask why this is a nice thing, since your car most likely gets along fine without such things.

Well, first, it offers the possibility of refilling tires if need be, or, if you like, any number of air-powered accessories, like tools (impact hammers/wrenches, drills, jacks, etc.), or an ‘air seat’ for the driver (highly over-rated from my experience on school buses that have them), or air suspension bags (to aid the shocks and smooth the ride), or to run air horns. However, one of the things that our bus didn't have as part of its air system was an auxiliary tank.
Air brakes for a single unit vehicle only need one tank with three partitions. The first partition (wet tank) is the place where air is stored for future use, and to trap more of the moisture that might have made it through the dehydrator. The second partition feeds from the first tank and serves to provide air to the front brakes, and the third (also fed from the first) provides the air for the rear brakes. This is why, on a vehicle with air brakes, there are either two pressure gauges (one each for the second and third partitions) or a single pressure gauge with two differently colored needles, each indicating one of the two brake partitions. (Multi-unit vehicles with air brakes usually have a separate gauge for the trailer brake tanks.)
Now, some of the people on the Skoolie board had just tapped into the first tank for a ‘service’ air line for tools (or in a pinch, to hook a compressor to, in case the one on the engine failed), but it’s not something to tamper with if you want safe brakes. I wanted to be able to use an air line for tools, as well as run air horns, and have the possibility to upgrade to air suspension bags in the future if we decided we wanted it. In order to do this, we needed an auxiliary tank.
20 gallon, 8 port tank from Hornblasters.com

I found an auxiliary tank online that was a 20 gallon one that would fit alongside the air brake tank under the bus. While one might think that this would be a simple matter of running a line between that first partition of the brake tank over to the auxiliary tank, you can’t do that, because there is a maximum amount of time your air brake system can take to get up to “working pressure” of about 85 psi from starting with no pressure. If you hook a 20 gallon tank up to that first partition, you have to bring that whole storage area up to the 85 psi threshold within that minimum time, which just doesn't work.
Air pressure valve, 85 psi on
In order to get around this problem, I had to install a pressure valve in the line between the two tanks. This valve stays closed until the pressure in the brake tank partitions get up to about 90 psi, then opens, allowing the compressor’s air after that bring the whole system up to pressure over a longer period of time. One of the things that ends up happening here is that I have a lot more air available for my brakes when the system is up to pressure (120 psi), as the 20 gallon tank can feed air back to the brake tank as long as the system pressure is over 85 psi.
Bedrails can make good structural supports!
The pressure tank I got had a whole lot of ports, but none on what I wanted as the bottom (because of the placement of the ‘feet’ for attaching it), and one on what I wanted as the top, so I ended up having to support it from underneath, rather than bolting it directly to the floor. The location of this port to be facing down was important so that it could be used as a drain to get rid of excess moisture, and I did double-duty in putting in a pressure release valve in, so if the system over-pressured (150 psi +), it would let the excess pressure out and save other elements from stress. , but I could also manually activate it as a drain.
Building supports for the air tank
So, one port was the pressure relief valve, another was the air coming in from the brake tank, and, for now, only one port would be used for feeding up through the bus body to two air sounding devices. The first was a Leslie Supertyfon RS-3L that was originally installed on a Conrail Diesel locomotive that my father had acquired somewhere (more on this later). The other was an ‘air chime’ which, when used nautically ends up meaning an air horn, but in this case was the closest I could get to a steam whistle. It channels the compressed air through four different chime pipes, a rich sound compared to the air horn.
Lifting the tank into place
Jacking the tank into place
The next thing to do was to lift the tank into place, which is actually tougher than it sounds, as I was attaching it to the bottom of the floor and to the side of the bus' 'skin' where it drops down.  In order to hold the tank in place, I decided to use a nice floor-jack and lift it, but this also was trickier than it sounds, as the tank was balanced just so and having the supports catch on the brake tank or the skin of the bus could cause it to tilt and slide off the jack.
The new tank and pressure regulator in place
To be continued (in Part II) …
And for a really nicely detailed explanation of air brake systems, look to this great Army informational film from 1967:

Tuesday, October 28, 2014

Buses and fuel

  On a bus-conversion board, I found a discussion on fuel tanks. Some buses have one, and reports of size varied from 40-100 gallons. Some buses come with two (seemingly of the same size) which vary from 30-100 gallons.  (It would be awesome to have two 100 gallon tanks … As it is, we have a 60 gallon tank.)  But perhaps more important for how far you can get on your tank(s) of fuel is your miles per gallon (mpg).

  As for mpg, actual mileage of fully converted buses (that people have reported) go from 3-16 or so (diesel).  Much of this seems to hinge on gearing and travel speed, but some is in the styles of buses, with 'conventional' or 'long-nose' chassis get better mpg than the 'pushers', which isn't a surprise, as the nose is more aerodynamic than the ‘flat wall’ of the buses with the rear engine.  Even with the aerodynamic issues, buses lose out in mpg because, as Mr. Jake von Slatt so nicely puts it, they're steel skin over steel supports with more steel inside, all mounted on a true medium truck chassis. Plenty heavy, but plenty safe , and with lots of space. Ours, even with the low amount of travel it gets and the much higher amount of idling is getting about 12 mpg.

  In comparison, while most factory-made RVs are on lowered chassis to optimize head-space, and are built of wood, fiberglass, aluminum, and sometimes steel in order to reduce weight, they still seem to get between 2-16 mpg (diesel), with some of the newer hybrid engines hitting on that upper range.  But the structural stability of these is nowhere near that of a bus, and that is not even factoring in the large slide-outs that compromise the structure as well.

  So, when asked about (or confronted with a) “well, wouldn't it make more sense to just buy an RV for better mileage?” or “don’t forget that all that weight you’re adding in tanks/walls/appliances/frippery will take away from your mileage!”, I have to take a deep breath and re-iterate that school buses are about the safest vehicles on the road.  And yes, while a lightly (or under-) loaded vehicle is likely to get better mileage than one that’s fully loaded, buses with air brakes stop better when loaded, and most buses are geared low enough that the added weight really doesn't stress the engine too much. (One guy on the Skoolie board commented that he built Jacuzzis into his buses and the mileage didn't vary at all whether the 8/10-person Jacuzzis were full of water or empty.

  We're been exploring WVO (Waste Vegetable Oil) as a fuel source, in order to make the project more efficient in its mileage. Why WVO, you might ask? Well, most diesel engines will run on it with -no- modifications whatsoever (Apparently, there's a type of fuel-lubricated rotary fuel pump on some engines that has an issue because the WVO is more viscous than diesel fuel). Major costs involved in the conversion are auxiliary fuel tanks, a fuel tank heater (WVO needs to be at about 160 degrees to flow like cold diesel), a flow switch/ electric valve and possibly new, corrosion-resistant fuel lines.

  There is a filtering/ settling process to actually get the WVO to be usable (though some don't worry about this - which may or may not damage the injectors), but you end up with a cleaner burning fuel that smells like french fries (or probably in our case, wings).  There’s an outfit in Mississauga, Ontario that makes in-line pressure-driven centrifuges that would take water and particulates out of the WVO.

  I've asked on another board how the mileage with WVO compares with diesel, and it seems like WVO should give about 80% the power of diesel.  I've been toying with getting another tank to get 50-100 gallons worth of travel of our trips for just the labor and filters of processing out the sludge from the WVO - which will likely be well worth the savings at the pump, since many restaurants have to -pay- to have the stuff disposed of ...

Monday, October 6, 2014

(Near) Winter Camping at Sprague Brook Park

  At the end of November of 2013, my son and I took our two dogs to do some near-winter camping at Sprague Brook Park in the south of Erie County.  We had never been to Sprague Brook, but it was suggested to us as a place that had ‘winter camping’.  It turns out that that means that the small loop of power campsites is open until November 31st, but the bigger loops of unpowered sites is already closed.  I was actually happy that the site would have power, since the bus doesn’t have a heating system.  I had thought that I would bring two small 1500W space heaters, which I figured would keep the bus warm.

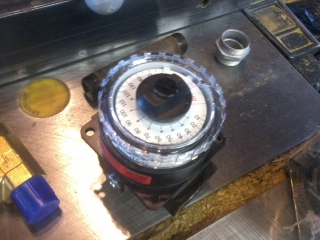
Such a nice glow ...
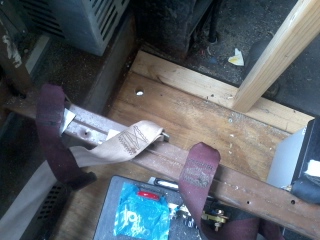
  I had just had the almost 3ft by 9inch plastic 'School Bus' signs removed and replaced with glass to let more light in, so it really changed how the bus was for driving (I was able to see the light above the intersection through the new window!  Conversely, the new windows provided a way to get the sun in your eyes ...)  I also pulled out a couple of light fixtures to let us see in the evenings.  The first of these is a nice brass fixture that is reminiscent of a gas lamp that a previous owner put a little push-switch on.
  I put this up on the wall in the ‘cabin’ area so we could see to eat and read in the facing bench seats.  I had some nice 40 watt amber bulbs, so I put them in and it gave the ‘cabin’ area a nice cozy glow.

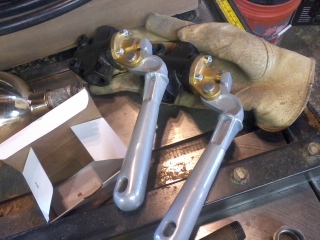
The other fixture was a carriage lamp that I put up near the bunk, as our son likes to have a night-light.  I didn’t want anything really bright, since I dislike light while I’m trying to sleep, so I settled on a little 3 watt ‘flicker-flame’ bulb.  It seemed like it wouldn’t give much light, but at night when you’re trying to sleep, or get around, it gave off more than enough.
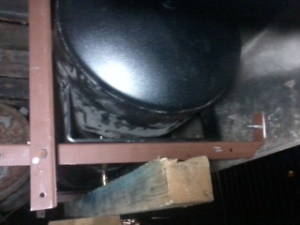
And you can just make it out despite the
fluorescents in the garage ...

  We stocked up with firewood, a large, old, several gallon coffee tote full of very hot water, several gallons of drinking water, eggs, bacon, venison, bread, butter, onions, potatoes, coffee, hot cocoa, and some other sundries along with our sleeping bags, a cot (only one of the bunks was done), and warm hiking clothes.  Even with all that, we stopped by the EnglishPork Pie Company on our way to the site so that we would have some warm food in us while we set everything up. 

  The trip was nice.  It started out on four lane & six lane highways, then to four lane roads, and then to nice winding two lane roads through small towns and over streams along water-worn cliff-side that showed the geology of the Devonian period.  But it was slower going, some slower traffic and stop lights holding us back a bit.   The pies turned out to be a good idea, as it got dark just as we got to the park, and it was a slow process of backing up and checking behind the bus, then adjusting the bus and backing it some more, and checking and adjusting again.
The bus, in situ, with the moon, just after parking ...


  But our campsite was right across the loop from the washrooms and, it turned out, we were the only campers there that night.  We set up the extension cord to the 20 amp outlet and plugged in the heaters and the lights, though when both the heaters kicked on, the flicker-flame bulb wouldn’t light, but that wasn’t a big deal, as there were streetlights around the campsites.  These probably wouldn’t have been so bright when there were lots of leaves on the trees, but in November, they spread a lot of light around.  Luckily, our campsite was in amongst a good stand of white pines which tried to help.

  As the evening wore on, though, the heat that the engine gave us for the bus interior was wearing away, and even with the two space heaters, it was chilly.  The dogs really didn’t care, however, and were happy out on the lines that I tied to a nearby tree, as well as being in the bus.  Our husky decided that the bunk was for him.  The only downside of having the dogs was the accordion-style bus door, which can make it a bit more awkward to clip the lines on or off their collars, but we work it out, and get a fire started.

And this is what warm looked like in the morning.
  But our son breaks out a surprise that my wife sent – some candy.  We use the bread, some chocolate, and Mary Janes to make some tasty Toastite sandwiches, and we do some setting up and reading before bed.  Given how cold it is, I give our son my mummy bag (good down to 0 F when I got it years ago) and he opts to stay on the (for the moment novel) cot, and crawl into his sleeping bag on the bunk still in my clothes.  Luckily, this means I got the husky for extra warmth.
And here's the bus at the site in the light ...

  The morning was chill and quiet.  The temperature went down below freezing overnight, and in the light I discovered that the side door that I ran the extension cord through was kept slightly ajar by the cord, so there was a source of cold.  Of course, the bus is lacking a whole bunch of insulation at the moment, so it is easy to get cold.  Rerouting the cord in the light is a whole lot easier, and I got the cord through the back door.


  Looking out from our campsite, we can see that we’re on one of many terraces cut by the stream over time.  After we get dressed, we take the dogs for a walk down to the bottom of the valley, watching some deer make their way quietly off to the east and away from our noise.  Upon reaching Sprague Brook itself, we were a bit surprised at how small it was, but it was a fast-flowing stream with rocks of many different colors amidst sandy shoals, and the banks showed the past streambeds that had fallen into disuse when the stream’s erosion had undercut trees that had fallen and diverted the flow.  But, of course, this was still before breakfast, so, our curiosity sated, we walked back up to the bus.


  We started a fire and while it was getting to where I can cook on it, our son discovered a playground that was just at the edge of the campsites, so he goes and plays for a bit.  I got some coffee, hot chocolate, bacon, eggs, & potatoes cooked up for breakfast, and after eating, cleaned up and decided to go for a nice hike.  I ended up with both dogs on their leads, one on each hand, which actually balanced me out.  As we walked along the south side of the lip of the stream’s valley, we made some good time, and found another playground.  And another and another.

  The first leg of our five mile hike took us past four additional playgrounds before we got to the downstream bridge across Sprague Brook, and after crossing the bridge, we found another two.  The dogs and I weren’t as interested in these, but my son was, so each provided a delay to our hike, but not a really bad one.  The day was overcast and cool, but not too windy, so it was a great day for hiking.
 
A selection of the trails available.  Our site was in
that lower right loop.
  The trails at Sprague Brook were numerous, including an 8 mile loop along both banks of the stream, but we only hiked up to more direct way to the ‘overlook’ in hopes that we could see the bus which was essentially just across the valley, but we couldn’t.  There were just too many trees.  But our hike back was a bit more circuitous, following the lip of the valley to some interesting places where the roots of trees were the only things holding up the ground and making quite a drop.

The high point of our trip - altitude-wise.

Our son with the Brook  on one of the overhangs ...


  We hiked about 5 linear miles and up and down some 600 feet (250 down, then 350 up and 350 down and 250 up), and got back none too soon, as it started a cold misty rain just as we got back to the campsite area, but it stopped again after 20 minutes or so.  The dogs loved the hike and were totally energetic for almost all of it, but they crashed when we got back to the bus, and just slept for hours.  We got another fire going and set up our dinner of bacon, venison, Phineas & Ferb mac & cheese, and potatoes & onions, topped off with candy-filled Toas tites for dessert.  (We earned it.)

  We read and stayed warm up in the cabin area, then, as getting ready for bed, I realized that the two heaters drew so much electricity from the 20 amp outlet that one of them wasn’t heating, just basically being a fan.  After that, I turned off the one that was putting out less heat, and we just had the one heater.  We slept in our clothes again, trying to keep our heads inside our sleeping bags, as the air was very chill. (Not surprising as the temperature got into the low 20’s (Fahrenheit) overnight.)


And lots and lots of terrain ...
  When we got up in the morning, it was dreary.  We didn’t have enough wood for a breakfast fire, and our camp-stove ran out of gas, so we had cereal.  We took one more hike down to the stream, which was festooned with icicles on branches and sticks near its banks.  After that, we tiredly policed up our campsite and made our way in the bus out of the campsite and back home.   The trip was fine, and it was nice to get the 
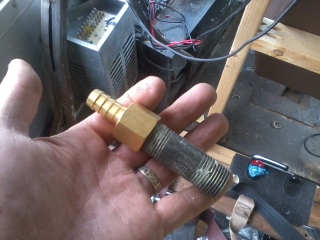
bus up to temperature and get the bus comfortably warm.  Unpacking took a bit, but we learned a lot (like that we needed to bring more firewood and that I need to get the 30 AMP hookup working!).  Most of all though, our son (and the dogs) loved it and couldn’t wait to go again.

Monday, September 29, 2014

A Warm Reception

  So after finishing the first bunk, we gave the bus a test.  My wife and I got invited to a multi-day wedding reception for a couple of our friends on another friend’s land out near Franklinville, NY.  The trip was only about an hour away, but it wound along the 400 expressway and then up into the edges of the Alleghany mountains on Route 16.  The weather was great, and the bus ran nicely.  When up to speed, I could take most all of the hills along the route in fifth gear, but we still ended up slowing some people down because I wouldn’t speed (much to the relief of my wife).

  For this trip, I brought an inverter and wired up a 12-volt outlet so that we could blow up a queen-sized air mattress while the bus was still idling and cooling off the turbo fan.  And the fan did get warm.  The land we were headed for was on a small 1 ½ lane road that I missed while we were looking for it.  Luckily, it was a nice, clear day, and there were plenty of places that farm, gravel, or other trucks and vehicles had packed down and could be used to turn around.  So we did. And we got on the road and drove happily along it.

  Having never been to this location before, we weren't sure if the barn at the bottom of the hill just off the road was the one that we were supposed to park at or not, and so we drove up and set the air brakes half-way up a fairly steep incline where the reception was actually at.  After several hellos and a brief confirmation, we found that the barn (now behind us) at the bottom of the hill was, in fact, the right place, so again we were going to have to turn the bus around.  And, I’d have to get it going on the hill.

  Now, I learned how to drive on standard (manual) transmission vehicles, and I grew up in the mountains, but this was to be the first time that I had to put the bus with its diesel engine to the test in this environment. But it was surprisingly easy.  The very low gearing of first gear (that I routinely complain about because of the fact that I have to use it to get the bus moving, but then have to shift out of almost immediately as its top speed is 5 mph) was awesome for getting the bus moving, even if I couldn't get it above 15 mph getting up the hill.   But, of course, just on the other side of the hill was, well, the other side of the hill going down.  Luckily here near the top, there was an intersecting road with a wide mouth at an angle that allowed for me to bring the bus along on it, back up a little, and then get the bus turned around. 

  Getting back to the barn was then easy, though I did find out that the seemingly big (to me) 7.1 L T444E engine, even with the low gearing, wasn't enough to hold the bus back (in fourth, which I thought would do it, but I probably should have been in third).  Now, toward the end of making the bus stop for the parking space at the bottom of the hill, I used the brakes, which did slow the bus, but I now know that I didn't use the “stab” braking that I should have, instead using steady pressure that would have, on a longer, steeper hill, likely overheated my brakes.  (Stab braking is a hard use of the brakes to below the ‘critical’ speed you need to stay below, and then a full release until you’re just above the ‘critical’ speed.)

  So, at the bottom of the hill, we parked the bus near the barn, secured it, set up the air mattress, and then walked back up along the road to the reception.  There, most people were camping in tents, so we were at a distance from them, but, our ‘steel tent’ was bigger.  But we brought up some camp chairs and our bocce set and had a great afternoon and evening, with DJs and live music by Penny Whiskey.

  We cooked in our 'Toas tite' maker over the communal fire, and in the morning I made espresso over a camp stove and we had a half card table that fit perfectly between the two facing bench seats, so we had our breakfast there.  We stayed until late afternoon, and made our way back home, which was also a slower trip, but because of my adherence to the speed limits.  It turns out that there was some manner of motorcycle rally, and we were stuck in the ‘parade’ behind it.  Otherwise, the trip home was uneventful and fine. 


  We did realize that the narrow hallway along the bus was going to take some getting used to.  We spent plenty of time getting in each other’s way realizing the thing we wanted was at the other end of the bus, past the other one of us doing something along the way.  But we worked things out and, really, more organization would certainly help.

Sunday, September 21, 2014

The oven (Ward & Son 164-50)

  A really good friend of ours offered to give us whatever we could scavenge out of a 1970's vintage RV trailer that had been sitting in a field, unused and untended for many years, if we would help get it out from where it was.  We took the bus and our 4x4 pickup and a ton of tools down to the field which was basically an enjoyable hour's drive away. (Well, within a few hundred feet, as the road down to the field was more washed out than the pick-up could take.)

  We got some great stuff from the trailer, including the electrical box (forthcoming), a fridge that was just the size we were looking for (but it didn't work), a water tank, water pump (pressure switch broken), LP regulator (works great!), and the LP stove (upon which I'll focus in this post).  The stove had been used in the past without being cleaned, the roof of the RV had developed leaks, and some field mice had discovered that the oven was an awesome place to live and the fiberglass around it was a special type of nest material.  However, looking past the rust and mess, there was a full stove (range and oven) that had four burners.  The sticker on the drip tray indicated that it was a Ward & Son 164-50 stove.

  Now that may not help you visualize what the stove is, as it seems that Ward & Son is out of business and has been for some time.  But, the stove measures about 21" wide, 19 1/2" deep and 17" tall, so it seems small, but just about on-target for oven/range combinations.  Modern ovens tend to be a little taller and have correspondingly taller ovens.  They also tend to have piezo ignitors instead of pilot lights.  And it is really hard to find one with four burners, as three burners seem to have become the standard, probably to make room for bigger pots on the range.  That said, they tend to run between $500-$800 new (Amazon, Camping World), so I was really hoping the stove was okay.  I gave it a really brief cleaning and got a 20 lb propane tank, hooked up the regulator and the stove and tested it.  Each of the four burners worked perfectly, and the oven did as well.  A big consideration here is that the oven has a pilot light but the burners do not - they need to be lit with a match or lighter every single time you want to use them (but it's not a problem for us).

  This successful test of the stove lead me along the refurbishing trail.  The outer rails, heat deflector, and stove door handle were chromed, but covered with rust.  The stovetop, oven door, and drip tray were a steel that was shined, but also pitted with rust and grime (I thought I had pictures, but I can't find them).  Investigating re-chroming, I was advised to get a little sand-blaster and paint the stove instead.  This seemed reasonable, especially since the only high-temperature stove paint was the flat black type.  I thought this would end up making the unit look somewhat like a cast-iron stove, which would fit with our concept of a Victorian era interior.

  It turned out that the sand blaster, loaded with black diamond grit (coal), etched the chrome and removed the rust, and even the fake wood grain (on plastic or vinyl) wonderfully.  The thing it really doesn't do well with though, was the grime.  This, I think, was old, cooked-on and reduced oils and fats.  These I ended up cleaning off with a wire wheel on my angle grinder. Finally, I had everything that needed to be painted prepared, and spent some time cleaning (and disinfecting) the oven interior and the range-top structure, and reattaching the spring to one side of the oven door.

  When I got to painting, I found that in addition to the flat black Rust-Oleum High Heat, there was also a gloss black paint in high heat, so I decided that I would keep the larger bits of the stove in the matte black, but make the trim (all that chrome) gloss.  Overall, it came out nicely.

  I did have one concern, however - that pilot light in the oven.  I know that it has to be in there so that the oven can kick on and off to regulate it's  temperature.  But I wouldn't want the pilot light on while travelling as it could blow out and start to fill the bus with propane.

  And, of course, having a pilot light going the whole time the bus is just sitting would just drain the tank needlessly.  So I've been thinking on how to tactfully put a shut-off valve for the stove on the countertop so we could avoid all that.

  But, in cleaning the knobs (they had plenty of grime caked on them) I found that the oven control knob doesn't just go from 'Off' to 'Broil' with all the usual oven temperatures in-between, but it also has a setting for 'Pilot Off'.  I will of course be hooking it up again to double-check before installing the stove to make sure that it functions as it should, but so far, this stove is all that we could have asked for.

  Thanks Laura!


Thursday, August 14, 2014

A July Bus Trip to Evangola

  So skip forward to now, and we just took the bus to Evangola State Park to stay for a weekend.  As of the writing of this post, the bus has some of the electrical system in and the three-way-fridge working on both the AC & DC settings (but all that's another couple of posts).

  The trip was somewhat marred by the fact that the alternator had lost its regulator.  While the alternator had never put out really high voltage levels, they'd always been sufficient to charge the batteries and run the electrical needs of the bus systems.  With the regulator problem, the alternator would put out 13+ volts for the first few minutes of the engine running, then only put out between 5 and 9 volts.

   A couple of days before we set out on Friday, I had made my way up to the Tonawanda Res to fuel up the bus, and due to some poor weather, I had the lights and wipers on for that run, and these, then, ran off the battery, and the ammeter was showing that there was 12-13 volts over that time which seemed low, but okay for the way the alternator had been since we got the bus.

  Now you might be thinking, 'Hey, wouldn't you have realized this sooner?  I mean, on my car, if the alternator goes, it's really dramatic.'  However, you have to realize that the bus is a diesel, so it doesn't have spark plugs or anything consuming the electricity as the engine runs (well, excepting the 'electronic brain' that sucks down some 10 milliamps), and the battery bank is two big 8D batteries, which hold a whole lot of amp-hours (~950 cold-cranking each).

  So on Friday, we set out from our house to pick up our son from camp downtown and head the additional 26 miles to Evangola.  Unfortunately, two blocks away from our son's camp, I was making a tight turn and shifted into fourth instead of second and stalled the engine.  Which then wouldn't start.  I boggled for a minute, as my pre-trip had shown 13 volts, but the battery now was down below 10.

  I  quickly grabbed the jumper cables and used the house batteries to jump-start the bus.  Given that the AC/DC converter (used to) have a charging circuit, we headed on, picking up our son, and running another errand in the city before heading off to the campground.  It was a nice, uneventful drive, and our site was wonderful.

  Our site was maybe 60 feet from a cliff right on Lake Erie and had wonderful sounds of the surf the whole time we were there. There was a nice, flat, grassy area (perfect for playing bocce), and very light woods off toward the cliff.   It was a twelve minute walk to the beach along the cliff-side trail, and we had cool people in the campsites near us.  A couple people stopped by to see the bus, and seemed suitably impressed.  And, on our last day/night we even had a friend come out to stay over, so we could be hosts!

  Even without a functional kitchen, we were fine.  I had the refrigerator working, so we were able to keep stuff cool (including the ice-cream bars in the freezer!) and most of our cooking was done over the fire (except for one breakfast that was cooked over a propane camp-stove). I brought a keg of cider and the little CO2 cartridge pressurizer worked well (and since there was no driving going on, it was all safe!).

  We had a massive thunderstorm, and had a couple of leaks from the hatches' vents, providing with another thing to check, although they hold up fine to regular rains.  On the other hand, the auxiliary air tank (coming up in another post) held enough pressure long enough for my wife to blow the four-chime whistle (same post as the air tank) at the parading pirates, much to everyone's enjoyment.

 Now, the whole time we were there, I had disconnected the house batteries from the converter and used my jumper cables to hook the bus batteries up to the 'charger' part of the converter.  Unfortunately, the charger part wasn't working so the bus batteries had no charge, and the house batteries didn't have enough charge, so we couldn't get the bus running when we set out to leave.

  Luckily, we have AAA with the RV upgrade, so I called and in 20 minutes or so Matt from Tick Tock Towing & Recovery showed up and spent the better part of an hour trying to jump the bus form his truck, pull-start it (since it's a manual), then finally calling for the big shop-charger to be brought out.  In less than five minutes on that the bus was started.

  And so we were off, on our way home.  But it had started to rain again, so I needed the wipers on, and the lights.  And of course, that meant that these drained the already low batteries further.  To the point where the electronic tachometer and speedometer kept resetting.  So, again the house batteries came to the rescue.  I ran the jumper cables up to the power bus bar and everything electric perked up.

  We made it home safely, and the consensus was that we all couldn't wait to go camping with the bus again.

  Success!

Monday, August 11, 2014

A life lesson learned ...

   Last weekend we took the bus out to camp at one of the nicest campgrounds we've been to (not that we've been to a lot, but it will be getting a post all it's own soon ...).  As of right now, the bus is not finished.

No plumbing.

None of the 12 VDC lighting.

No solid walls.

Exposed outer skin, insulation, and wiring.

No levelers.


And yet, our boy loved it.  He can't wait to go out again.

And it was a great lesson.  He told us that "things don't have to be perfect in order to be fun."

We talked about it and it seems like he's less likely to get upset over a long-range goal taking time to achieve if he can see the progress and enjoy it along the way.

Huzzah for the bus being a teaching tool!

Monday, July 28, 2014

The first bit of real, built-in furniture, the bunk beds.

(So, as of the time of this blog being written, I didn't have any good pictures of the lower bunk, and it was blocked from easy view by some furniture-grade pine plywood and a large pile of 8/4 and 10/4 unfinished red oak planks that are 9-10' long.  The bus has a wonderful capacity for cargo, right now better than the garage.)

  Not to downplay the seats, but there wasn't much building to those past the cutting and welding I spoke of before for the sideways one (at this point). Some plywood screwed onto the back and they were functional seats, which for a start was all we needed.  (Later, they would get more fancy with woodwork and hinged backs, but that's later.)  The next obvious furniture for the bus was a bunk bed.

  Why the bunk bed?  Well, even without other amenities, the bunk beds would allow for us to use the bus as a 'rolling metal tent'.  Also, a large amount of the studs that got put up were the front, back, and (under the rear roof hatch) side of the bunk bed area. And with the wheel-well right there, the floor wasn't as usable for other storage.

  In designing these bunk beds, I worked with the idea of using a standard mattress size (the common twin size), so that getting sheets and blankets would be easy.  That and so that people who slept on them would be comfortable.  After seeing what passed for a bunk mattress in some of the RVs/camping trailers at the County Fair, a regular twin mattress has tons of space.

These lovely wheel-well covers.
  The lower bunk was placed just over the top of the framework that I built to cover the wheel-well. This framework squared off the wheel-well so that it could be encased (with simple MDF in this case) and filled with fiberglass insulation to help keep down road noise.  Placing the bunk at this height also meant that the outside edge of the bunk would rest securely on the seat rail.

  The outer frame of the bed was done in 1x6" oak, and included a 5" wide 'pocket' at the head of the bunk to keep items in, and, if things were to jostle about during travel, they should end up in there and then not be able to escape afterward. (Recent case in point - one of our dog's tennis balls was rolling around on a fueling trip.  Dropping it in the pocket kept it from ending up under my pedals.)

These are the future drawer openings -
note that you don't need drawers for storage.
  Under the bunk, however, I ended up with almost 10" of space, and I worked to set this up as storage space.  My plan is to build slightly sloped drawers that can be slid out into the walkway, but won't open on their own as the bus rounds corners or hits bumps. I built this out of more oak, all fitted together with pocket screws from behind and then used 2x3 bits as drawer guides (which also work to keep stuff from sliding) for the future drawers.

  Several pieces of oak and then some plywood formed the base for this lower bunk, and an old mattress was slid in place, giving us a functional bed.  The upper bunk came months later, more from lack of time and materials than any planning issues.

  The upper bunk was centered in the remaining space to give about 23" of headspace between the lower and upper bunks and then from the upper bunk to the ceiling.  This may seem cramped, but is well within the layouts for the RVs/camper trailers that I was able to scope out.  Even so, it's not someplace you'll want to sit up quickly first thing in the morning.

  The upper bunk followed the same design as the lower, but ran across the windows on the outside of the bus.  The windows can still be lowered in a conventional manner from the top bunk, but since I put an emergency exit window in the center of the bed, the lower occupant can open that window themselves (and these are easily held open with a length of wood) to get some airflow.

The upper bunk, showing the windows and storage pocket.
Again, this bunk was held up with more oak, but because the bottom of this would be seen by more than the contents of the storage drawers, I wanted to do something a bit nicer to the bottom so the person in the lower bunk would have some aesthetics to appreciate.

The upper bunk with slats in place.
  While the oak is very nice to look at, the sheathing-grade plywood I was going to use to support the mattress wasn't.  But I did still have some MDF left over, and ended up cutting a sheet to underlay the plywood and provide a ceiling for the occupant of the lower bunk.  The little bit of wall under the roof hatch made this tricky, as it didn't allow a full piece to be put in place.  Luckily the big oak slats do a great job at hiding the seams, and by staggering the plywood above (and screwing it in place), everything worked out.

  I'll get some nice clean pictures of it for another post soon.

Thursday, June 5, 2014

Past the Training to the Terminal


So, armed with my CDL, I finished my on-the-road training and went to an active terminal, to pick-up and drop-off kids.  My terminal is a concrete block building with three bays for the mechanics to pull in buses, two small bathrooms, an area for the school coordinators to set up the bus aides, our manager's office, a sort of common area for meetings and waiting (and the coffee machine), and the area for the dispatchers.  All of this was a bit confusing as to where I should be when waiting, and I could and couldn't go.  I'll write more about it later.

At the terminal, things changed a bit.  I and another trainee I was in class with went to the same terminal, but our training wasn’t over.  Rather than being assigned our own bus routes, we went out with a driver trainer, and drove for their runs while the watched, guided, and gave us feedback.  It’s a whole different level of driving having the live kids in play.  Some get along and are nice and follow the rules, and some aren’t.  Some are plenty nice and friendly and chatty, but can’t seem to stay in their seats.  And while all our buses have seatbelts and the school district has decided that all the kids (PK-8th grade) need to be wearing them, most all of them don’t, even when we remind them to.  The problem is that as drivers, we can’t touch the kids, and unless we’ve pulled over and called it in, we can’t leave our seats while there are kids in the bus. 

In theory, when we need to leave the driver’s area, we should be setting the parking brake, putting the bus in neutral, taking the key out of the ignition, and if our bus has air brakes, we should deplete the air supply by ‘fanning’ the brakes.  (This is where you ‘pump’ the brakes quickly, each ‘pump’ releasing air to the point that your low air alarms go off and the emergency spring brake engages.)  When you’re on a run and trying to go from stop to stop, some not even half a block away from each other, you can see that it just isn’t viable to go check to make sure that they kids put on the seat belts, and even if it was, they all know how to unfasten them and the high seats keep the driver from actually seeing them.

Now, the trainers who ride with us take care of most of the discipline issues while we concentrate on driving and following our route sheets.  If you’ve ever been stuck behind a bus that seems to be hesitating, driving slowly, or putting on its yellow/red eight-way flashers at the last moment, it’s probably a new driver to that route.  The route sheets are actually made by the school districts, and are the best for hitting the kids’ stops, not for navigating traffic, or following traffic laws.  Routes can send your bus down one-way streets the wrong way, have you making left-hand turns from roads where left-hand turns are prohibited during the hours that you need to drop off kids, sending you around the block because there used to be a stop on one of those corners but it isn’t there anymore, or that you have to make a left on a busy street, or go straight across the busy street that has no stop signs or lights at that intersection, and making you turn on tight (not wide) streets with cars parked on both sides and poles, signs, and fire hydrants close to the curb.

And the route is timed.  You are directed what time to leave the bus terminal, and what time to be at each stop.  In between each stop, there is a calculated time to tell you about how long you should be on a road before a turn or a pickup or before the road changes its name (sometimes).  As far as my experience shows, this calculated time works out to travelling at about 27 mph from point to point.  Of course, a bus, especially laden with kids, doesn’t just go from 0 to 30 instantly.  It also takes time to stop it slowly and gently.  As such, I’m always running late.

But there are other factors to running late. There may be no kids waiting at the stop, and then you have to wait at least 30 seconds for them.  If there are kids, they have to get on, and then find a seat before you can move the bus.  And if the kids are being unruly, it’s not safe to really yell at them and make sure that they’re doing what they should whilst driving – you have to pull over.  And of course, this involves not just the discipline time, but also the stopping and starting time.  And then there’s having to go back and get a kid who wasn’t at their stop at the time they should have been, but the parents have called and the kids are there -now- so …

The summary of this whole thing, I guess, is that it’s a new sort of driving.  Even the very cool training that we got before reaching the terminal doesn’t really show you what it’s like to drive a real, live school bus.  For training, we had lots of time to be careful, but now we're on a schedule, and in essence, always late. More about this stuff later …

Friday, April 18, 2014

Follow the CDL road ...

  So something more up-to-date here, I'm getting my CDL (Commercial Driver's License) so that I can drive the real yellow (National School Bus Chrome) buses with the flashing lights for pay.  If you're considering getting your CDL with a truck-driving school you can look to pay as much at $2500, and even more if you're going for hazardous materials.  So, what is it you get from such courses?

  Well, as of right now I've just got past the physical and the written portions of the exams.  There are three levels of CDL; the 'A' license will let you drive the heavy combination vehicles (tractor-trailers), the 'B' gets you to be able to drive heavy single units (like a big, full-sized school bus), and the 'C' will get you smaller single-unit trucks and buses (say with more than 15 passengers, but not too many more than 25).  To get any one of these you have to pass a general knowledge test which includes safe driving practices, pre-trip inspections of vehicles, what rights and responsibilities you have when driving, how far from or close to some road/driving element you should or must be.

  You can actually get the CDL manual for free, and it has all the information you need (for your state, in
addition to the federal rules).  A ton of this information is common sense, as with the statement '[at an at-grade railroad crossing] you are required to yield right of way to a train' or the whole section on 'signalling' which boils down to 'you should signal to make turns & change lanes'.  But some of it is not so common-sense, like finding out that school & transit buses need to stop no less than 15 feet and no more than 50 feet from a passive (no lights, bells, or gates) at-grade railroad crossing and no less than 50 feet from an unattended lift bridge in order to determine if it's safe to cross.

  Some of it is sneaky too.  One of the requirements on checking cargo is that you have to do it 50 miles into your trip.  Or 25 if you get an older test bank question from New York State.  There are 50 questions on the general CDL exam, 25 on the air-brake exam, 20 on the passenger vehicle exam, and 20 on the school bus exam.  On each of these, you have to score an 80% or better correct answer rate.

  Happily, I passed all of these on my first go, and am now the proud owner of a CDL permit allowing me to drive a school bus (with an appropriately licensed trainer).  Now the fun begins ...


Friday, April 4, 2014

Evangola day-trip.


Early morning sun on the shore of Lake Erie
at Evangola State Park.  (Note: This was not my
shot and was definitely not the day I went.)
  I needed a day away, just to think and read and regroup.  To do this I drove the bus to Evangola State Park, which has a lovely beach and wonderful slate cliffs.  Well, it's really wonderful in the summer, like the picture on the right here shows (though the beach is a lot bigger - but this was a nice picture), but I ended up going on a drizzly day in January of 2012.

  Evangola is about 45 minutes from Buffalo if you take Route 5, but down south/west of Wanakah, Old Lake Shore Road branches off and the road goes along the shoreline behind some of the beachhouses (and estates!) and up on some low cliffs, so there are plenty of opportunities for some great views and some nice driving, if you don't mind going slower and doing some shifting.  Some of the roads were not in the best of shape and without the extra weight of seats in the bus, it was a bit bouncy in some areas.  I also felt like some of those roads were really skinny when I had to be on the very edge of the pavement to let people go by in the other lane.  My comfort level in driving the bus has gotten a whole lot better, but for this trip, I was extra-extra-cautious.

Yep, I took up more than one spot, luckily there were
still a few parking spots open for other people ...
  I set off around 10:00 and it ended up taking me about an hour to get there, but off-season, there's no gate fee, and the parking was easy.  Very easy really, as there was basically no other cars in the park.  Over the day a few people came and went, walking dogs or just braving the damp, cold weather.

  While I did brave the grey weather there, I also spent time with the basic seats I'd put together, some temporary tables, and some provisions.  My only regret here was that I didn't bring a pillow for my back.  The seats were fine to sit on, even for long periods of time, but the side wall of the bus got a bit cold, and a pillow would have been a buffer.  I did fire up the bus engine and put some heat into the cabin, but it never got really warm in the back, so the cold would seem to creep forward over time.
Not really roughing it.
  And there was plenty of scenery.  Some I could see from the bus itself, but others I had to walk to, and it's a fairly large park.

Looking north-east from the seat in the previous picture ...
 
The winter snowmobile trails map ...

And the cliffs and beach and lake looked like this ...

And plenty of room on the beach ...
  So after a pretty full day, I set back off around 4:00 and headed back to Buffalo via Route 5.  I ended up in a bunch of tractor-trailers for a bit, and felt right at home on the road.  Driving the bus took a bit of getting used to, just because it's so long and wide, but having that extra height and being able to see farther on the road was great.  I ended up getting home -just- after dark, so backing in the driveway was a little more taxing, but overall it was a great test trip!

Sunday, March 30, 2014

The trip that never was ...

  Before I got the floor finished and the seats in place, I had decided that I wanted to take the bus out for 'exercise'.  The engine should be run about once a month, and the bus should be moved at least a little to make sure the diesel fuel sloshes about and doesn't get set for algae and that the tires don't 'square' from staying in one position too long.  (The 'squaring' comes form the wires in the radial tires sitting with so much weight on them in one place for a long time.)

  I had planned out a nice route from our house out to Broderick Park on Squaw Island Park by the Buffalo River, and wanted to take my wife, our son, and my mother-in-law.  It was to be the first real 'passenger trip' in the bus.  I used the old seat holes and threw two seats in place, right up front behind the driver's seat, so it was mostly a big empty space, and somewhat loud when on the road, but I thought it would be fun.

The original entry steps.  Well, still the entry steps,
but now a little different ...
  It took a little bit to get my mother-in-law up the steps and into the bus.  She had some knee problems, and the bus only had two steps to get in.  At some level, that sounds simple, that she only had to make it up two steps, but those two steps (three, once you count the initial entry or the top step, depending) have to get you from ground level to 42 inches above, which is floor level.  And of course, I'd removed all the seats and the forward 'wall' and support railing when doing so.

  But with a couple of concrete blocks and a little wooden step, she got in, my wife and son got in, and we were ready to go.

  We got just outside the gate on our driveway, and I set the parking brake, went and locked up the gate, then got back in and we set off.  Once we had pulled onto the street, however, the air pressure, which normally sits right around 120-125 psi was plummeting, and there was a hissing sound. Well before we even got to the corner, the little 'wig wag' arm let loose and was swinging (as it should have, right at about 80 psi).  I pulled over and set the parking brake so I could get out and try and suss out what was happening.

  Once the parking brake was set, the hissing stopped and the pressure started to rise again.  I took a quick look out and around, but couldn't find a broken hose or leak, so when the pressure hit 125 again, we started off hoping that it was a fluke and we could go about our trip.

  It wasn't a fluke.  Once again, the pressure dropped and I decided that we'd just go around the block and stop when necessary to get the air pressure back up, then go again.  Four stops later, we were back in the driveway, everyone was off the bus and I was trying to figure out what was wrong.

That's not a shadow behind that front left bolt,
that's missing plastic that cracked out!
  With the wheels chocked and my wife taking the parking brake off while I was outside of the bus, I tracked the hissing to the rear axle, port side.  Climbing under, I found that a port pressure release (as I was to find its name later) was leaking.  I chocked the wheels and go into seeing what I could about the part.  Some scraped knuckles later I had it out and confirmed that it was not a seal, but rather a leak from cracked plastic.

  The port pressure release might look like a simple piece, but it's tucked way up inside the frame rail with the bolts behind the that go through from the inside to the outside, which means that the nuts are almost inaccessible back behind the dual back tires.   Luckily, with a wrench jammed in on the bolt, one can still, with long arms, blindly work a ratchet to get the nut loose.
The nice, spacious workspace.  The detached lines are
1/2" air lines that attach to the port pressure release.

   Now, by the time that I got the piece out, it was after hours when the parts department of the local dealership was closed.  I tried to do a parts search to figure out what kind of cost I would be looking for to fix it and get the bus going again, but without knowing the name of the part, that's really tough.  So I had to wait for the dealership to open and take the part in and hope that they had it.

  While they didn't have any of my exact make and model, they had an updated part that would meet the needed specs.  It turned out to be a simple part that cost only $22 and they just grabbed off the shelf, so I ended up getting two, just in case one of the others went in the same way.  Then I only had to put it back in.
At least the new one has more aerodynamic styling ...

  That seems sort of simple, in that it's just a matter of reattaching the relatively rigid air hoses back together, but of course, when I was taking them off they always wanted to screw back in because of the twisting of the plastic hose on the barbed fittings.  So when I started to screw them back in, they wanted to unscrew because I was twisting the hoses the other way.  I ended up spinning them in the direction against the threads for as many turns as I could manage and still keep control of their twisting, then fit them into the correct port on the port pressure release.  This ended up working fine, and the lines all went back together.

  Now, if you're used to hydraulic brakes, like I was, you might find yourself a bit intimidated by working on air brakes, but it really is much easier.  See, in a hydraulic braking system at this point I'd have to open the line at the brake and pump on the brake pedal and force the fluid (and any air bubbles) out of the ~20 foot line to the back axle in order to make sure that the brakes would work safely.  But in an air brake system, all you have to do is start the engine up, build air pressure, chock the wheels, take off the parking brake, then get out and check around the reconnected lines for an air leak.  As it was, I had none, and with the engine already running, moved the bus forward, hit the brakes and the bus stopped perfectly.

  Yet another bus hurdle was overcome, and while no trip was taken, everything was okay, and I felt a lot more confident in the buses' brakes.